
To kick off December, I had the pleasure of attending a wreath making workshop with the lovely and talented Rebecca Dawn Design. The wine and holiday cheer were flowing — and between all the eating, drinking and being merry, I created this Asymmetrical Holiday Wreath! I took you along via Insta Stories and after lots of questions and comments about the process, I finally had some time to photograph the wreath and publish a DIY post for you (better late than never, right?!). If you have an hour to spare, you too can create this modern, Scandinavian style holiday wreath with a handful of inexpensive, easy to source materials! They also make a lovely hostess gift if you’re looking for last minute ideas with a handmade, personal touch.
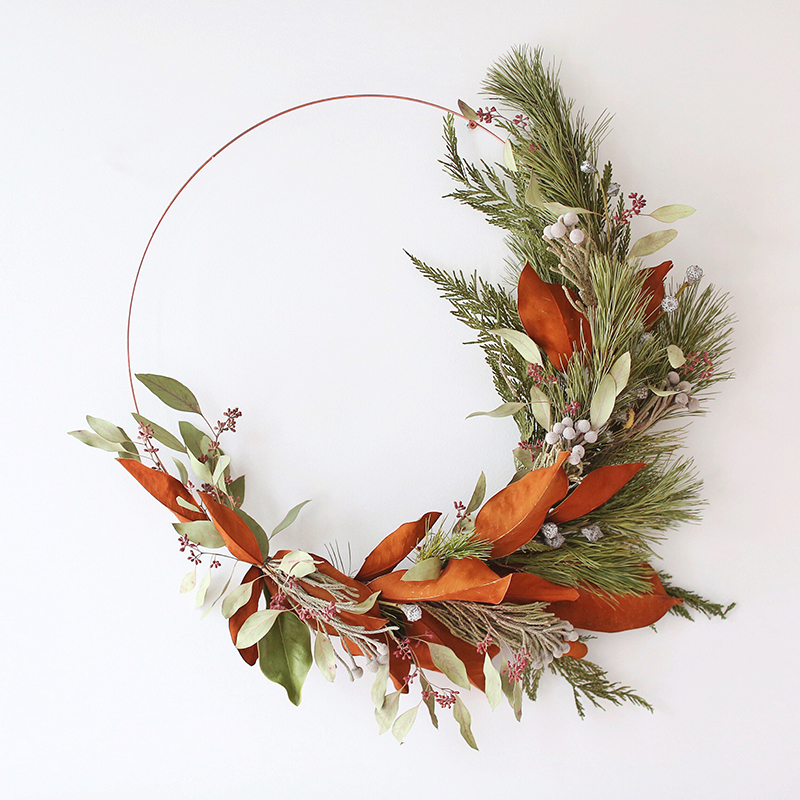
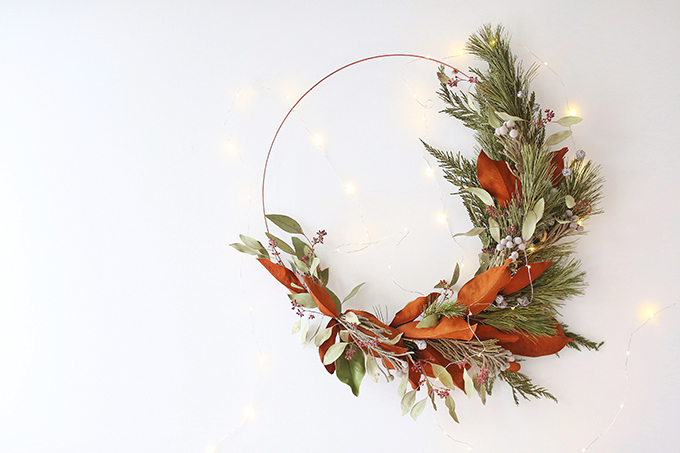
This year, I’ve definitely taken a more minimalistic approach to the holidays and decorating. Since my main focus these past few months has been refreshing our living room (stay tuned for the reveal in the New Year!) and we’re out of town visiting family for the holidays, we didn’t even set up a tree! Instead we decorated our new Bird of Paradise plant with a few twinkling lights, added some cotton stems to our vases and hung this Asymmetrical Holiday Wreath! If you’re looking for a simple DIY to add a festive touch to your minimalistic decor this holiday season, a fresh wreath is the perfect addition. Our home is brimming with greenery and lots of natural wood textures with a mid century modern vibe — so I selected Cedar, Pine, Brunia, Eucalyptus pods, Red Ironbark Eucalyptus and Magnolia Leaves for our wreath (it’s also makes the living room smell amazing — no tree required!). If you’d like to learn how to make an Asymmetrical Holiday Wreath of your own, throw on your favourite Christmas playlist, settle in with a glass of your favourite festive beverage (may I suggest Classic Winter Citrus Red Sangria?) and let’s get started!
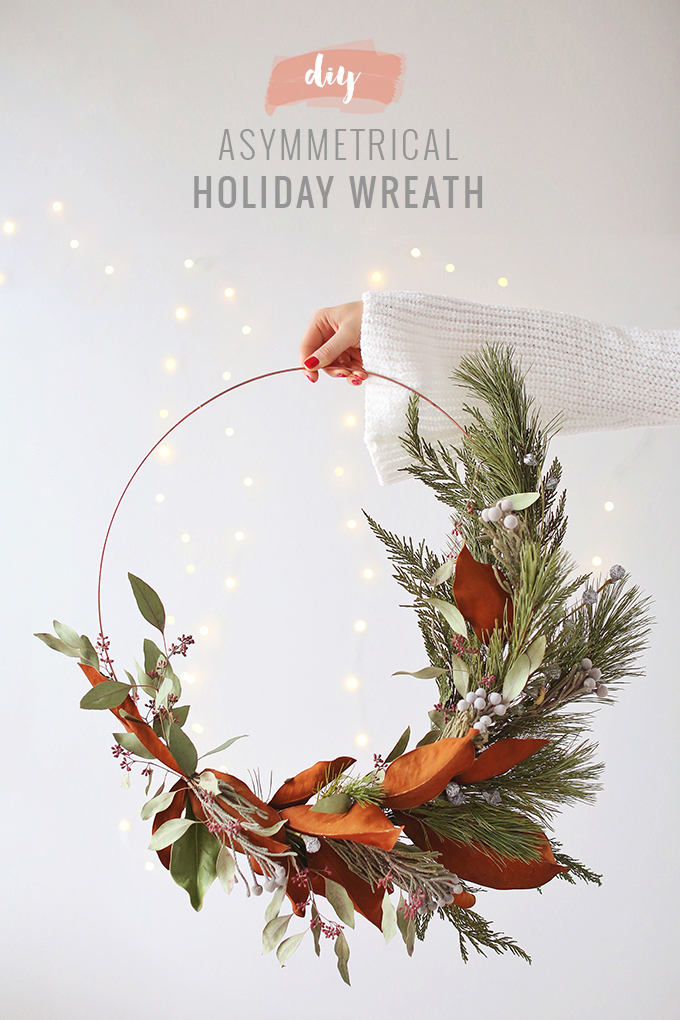
DIY | ASYMMETRICAL HOLIDAY WREATH
Welcome back for my first DIY post in quite some time, everyone! Tonight I snuggled up in a cozy robe with a delicious glass of wine to put the finishing touches on this post — and I’m so excited to share it with you! It seems we’re getting our white Christmas in Calgary and it’s really coming down outside so I’m happy to be here with you, getting into the holiday spirit!

This Asymmetrical Holiday Wreath may seem daunting, but I promise, you can make one too! Before this wreath making workshop, I had never made a holiday wreath of my own. Tonight I’m sharing Rebecca’s expert tips and tricks, along with a few things I learned while making my wreath to make the process as simple as possible.
To source your greenery, berries and foliage, I would suggest visiting a few local grocers, as well as a florist. Like an arrangement, wreaths also have primary, secondary and tertiary ingredients (this will sound familiar to those of you who frequent our FLOWER section!), so having a selection of foliage and berries in different colours, textures and sizes will ensure a visually interesting wreath. For this Asymmetrical Holiday Wreath I used Cedar, Pine, Brunia, Eucalyptus pods, Red Ironbark Eucalyptus and Magnolia Leaves. Locally, the best sources for holiday foliage, greenery and berries are Superstore and Safeway (you can purchase them in bundles quite inexpensively) as well as Plant (where you can find more unique foliage like Eucalyptus and Magnolia).

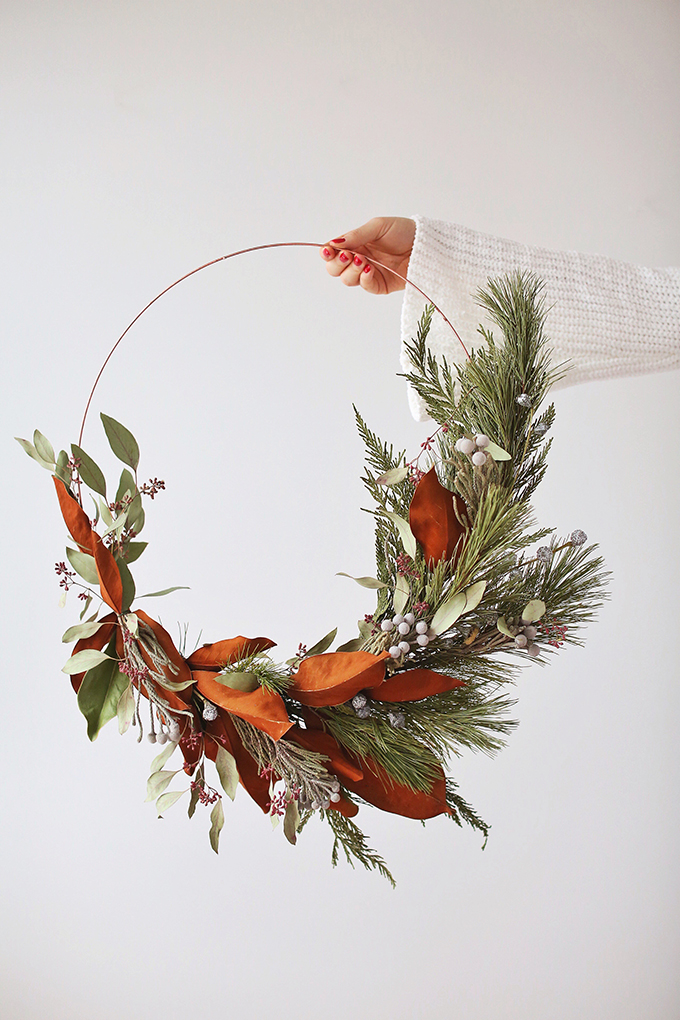
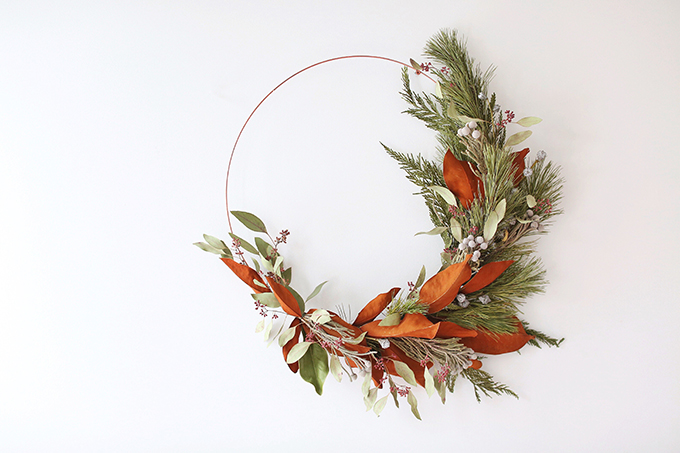
The Magnolia Leaves (those gorgeous cognac ones!) are the star of this wreath, with hearty and fragrant Cedar and Pine greenery to flush out the design. I finished things off with Brunia, Eucalyptus pods, Red Ironbark Eucalyptus for some icy pops of silver and warm pops of pink. I love this warm, neutral holiday palette with a touch of blush! You’ll find the rest of the supplies you need for today’s DIY at stores like Micheals.
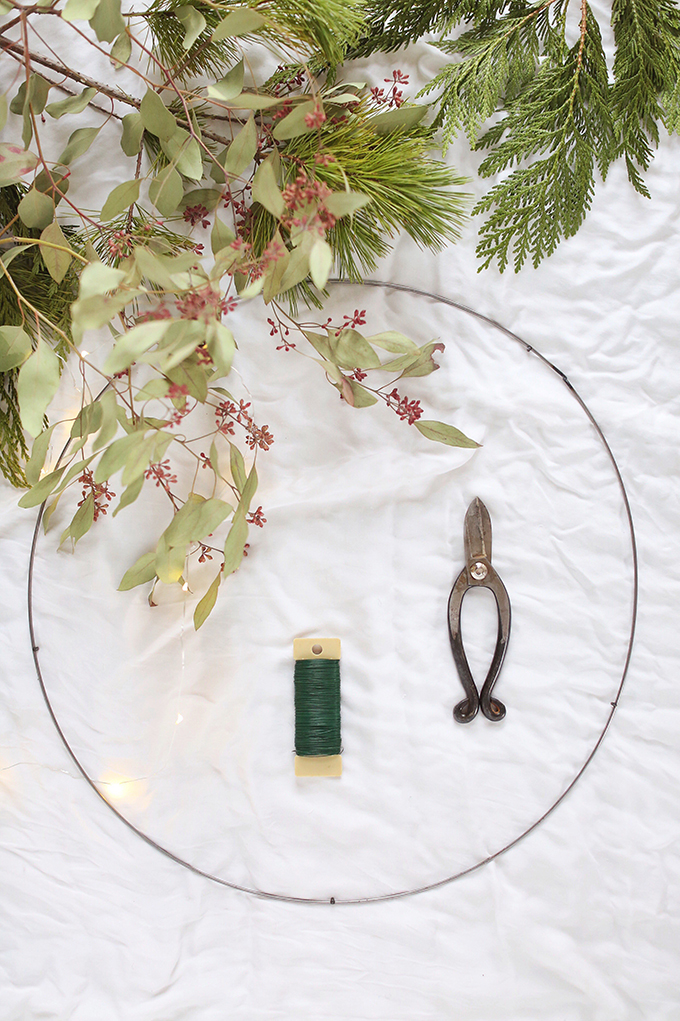
You’ll Need
• Wire wreath frame (you can break this one down into 3 single frames!)
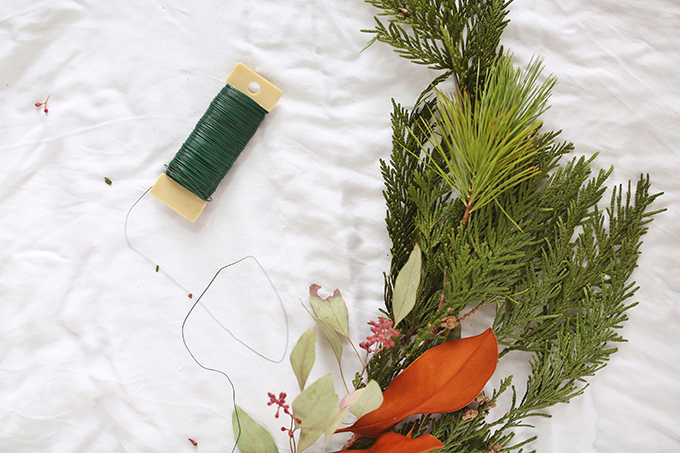
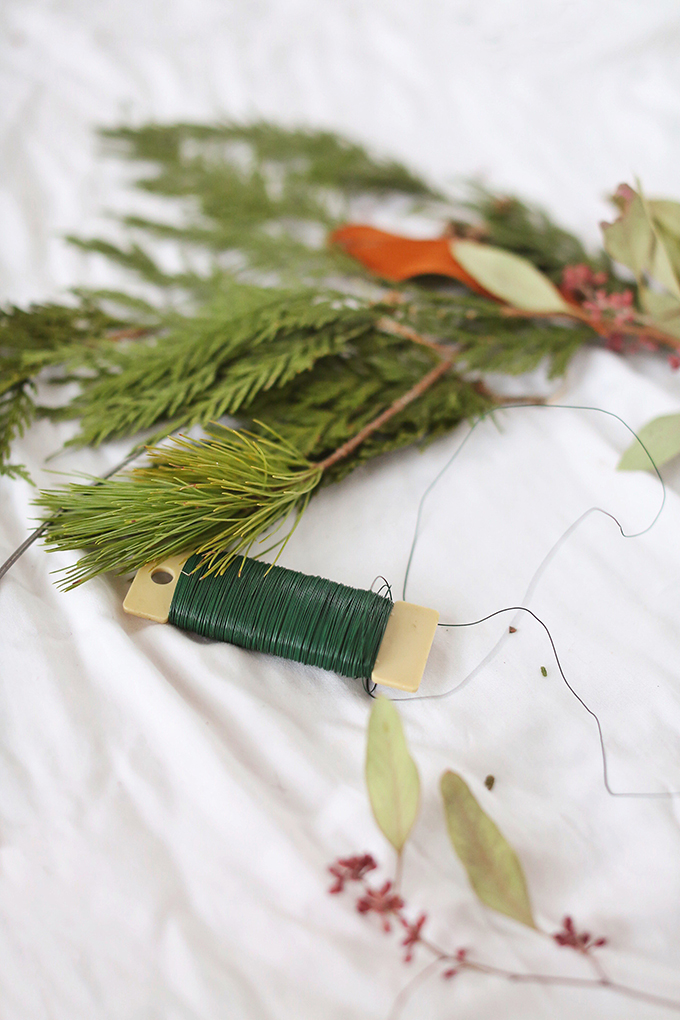
• Paddle wire (green works best)
• Floral clippers
• A few boughs of each type of each of greenery, foliage and berries you select
Asymmetrical Holiday Wreath Instructions
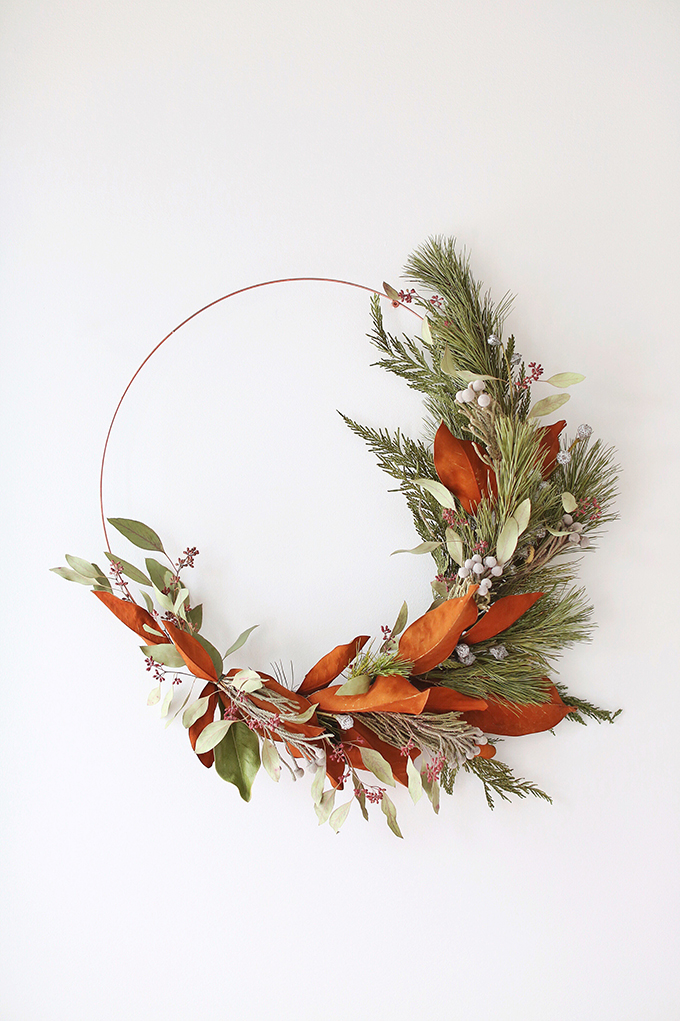
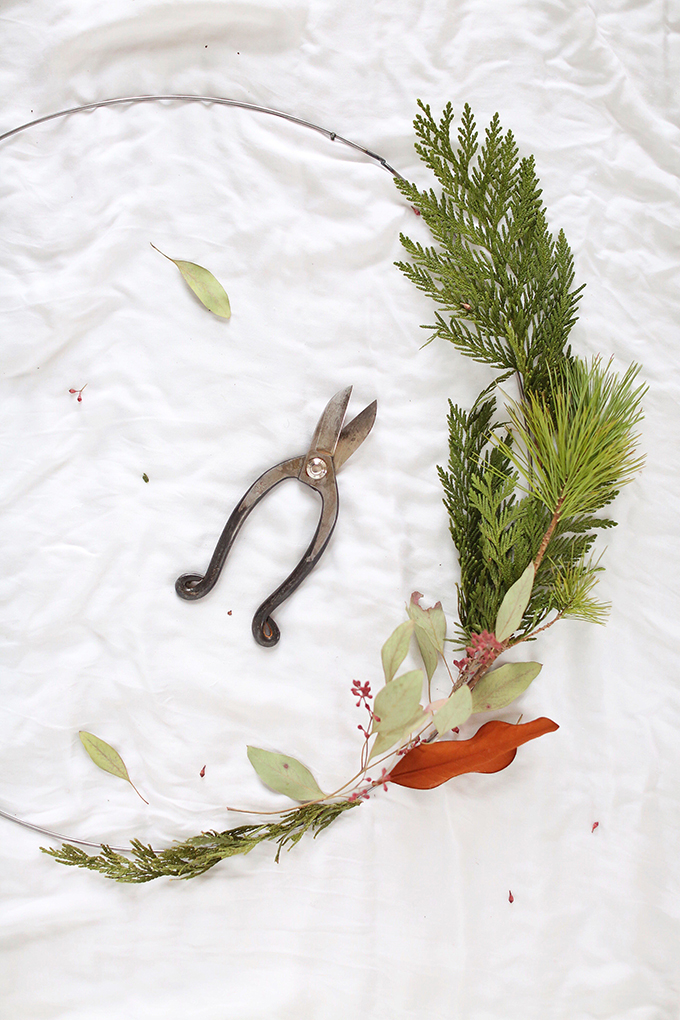
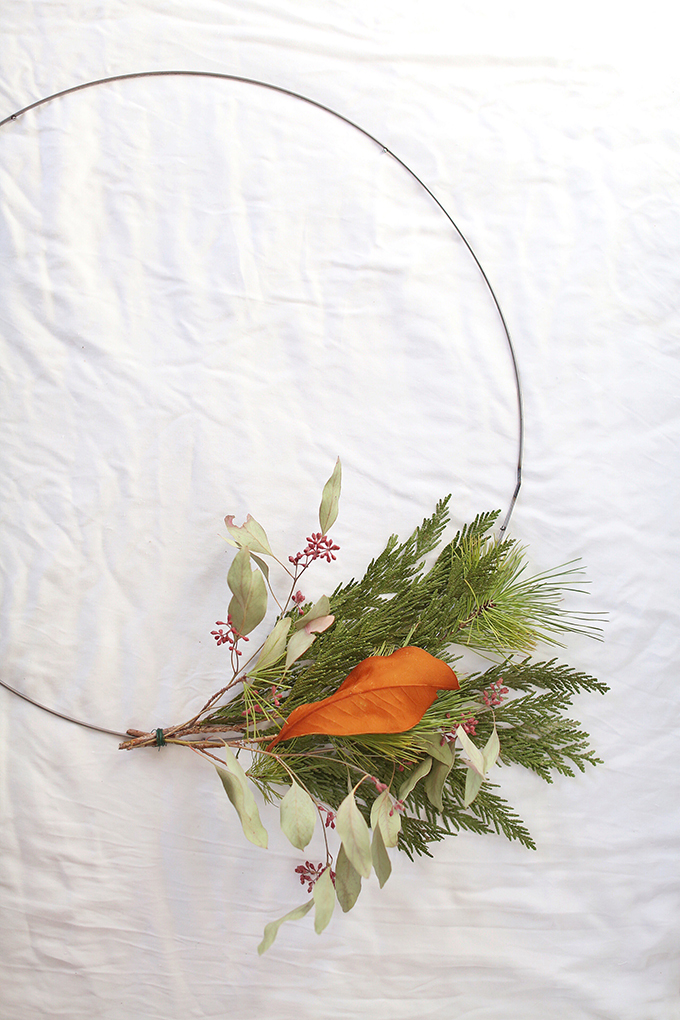
1. I’m a planner, so I found it helpful to make a ‘wreath blueprint’ before I got started. Rebecca always maps her foundation with foliage when she creates an arrangement — so took a similar approach with my wreath (I’ve learned a thing or two working with her all these years!). Make a mockup of your wreath by trimming my ingredients and working clockwise to create a light version the shape and design you’d like to achieve. If you have an inspiration image in mind (perhaps one from this post?), pull it up and create a light replica on the wire frame with your ingredients to get a feel for the design and scale of the bundles you’ll be making.
2. Once I was happy with the overall flow of my mockup, I snapped a quick iPhone photo of my design so I could refer to it as I worked away. This was extremely helpful!
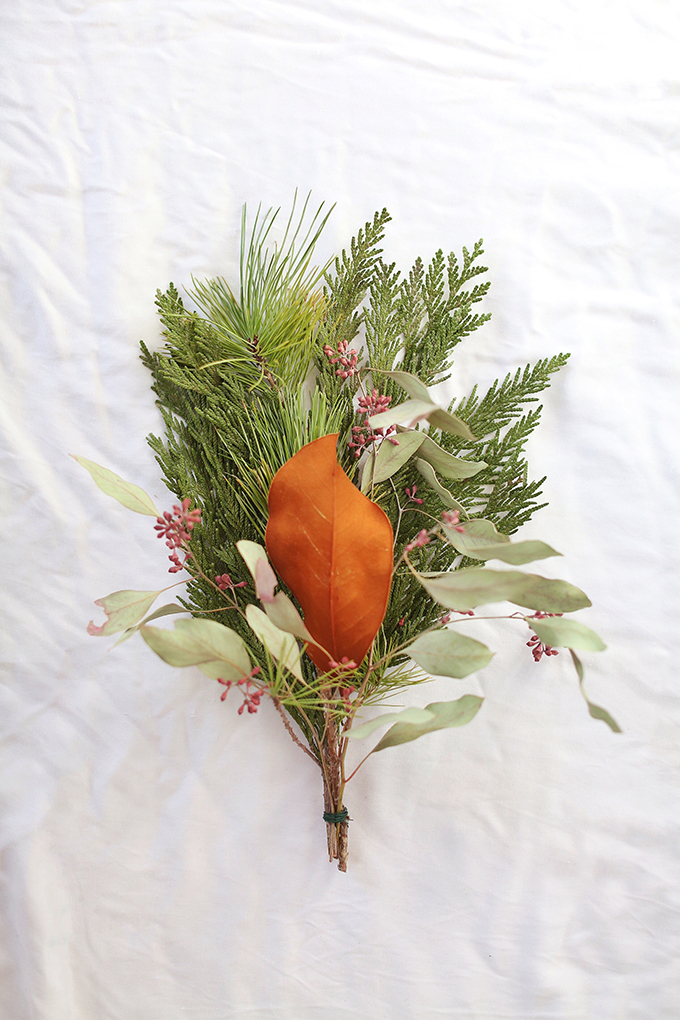
3. Then, I made large 3 bundles with all of my ingredients. When creating your bundles, keep in mind the flow you mapped out in your mockup — pull in a mixture of long and short foliage, as well as a variety of colours. When you’re happy with your bundle, secure it at the base with paddle wire. My wreath has a very wild look to it, which I achieved by not being to precious with my bundle arranging! I also found it helpful to look for greenery and foliage with a natural curvature that mimicked the circular shape of the wreath.
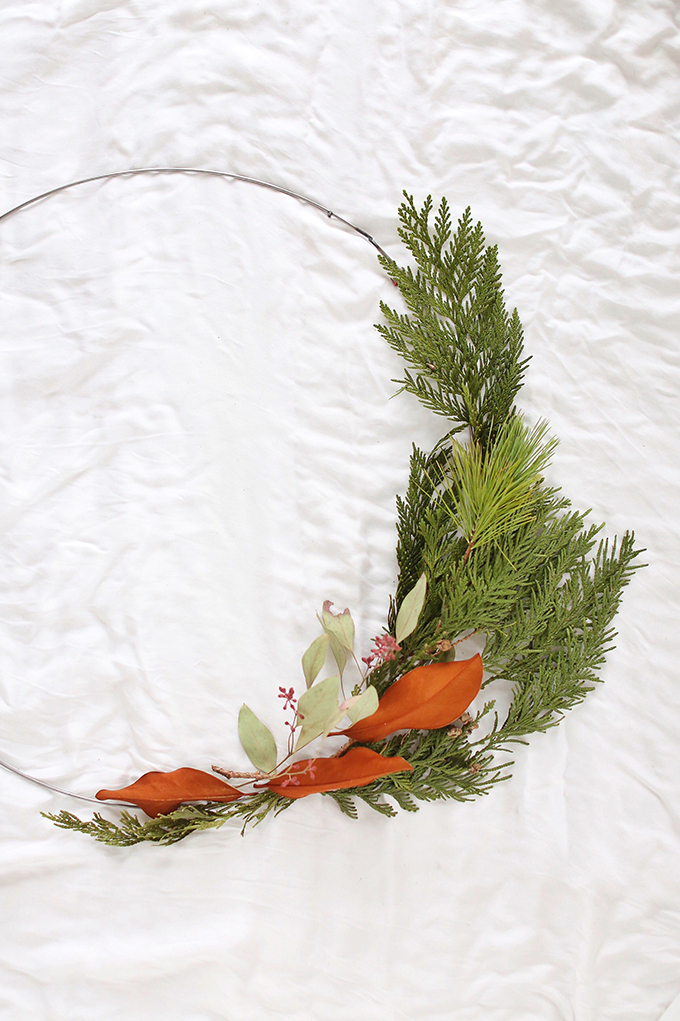
4. When I had finished my 3 bundles, I placed them down on top of my wire frame, arranging until I was happy with the placement.
5. Then, I secured my bundles by attaching the base of each bundle to the wreath frame with the paddle wire. Once secure, hold your wreath up to get a sense of how the longer pieces of greenery will fall. You may need to go in and secure certain pieces of foliage to account for the effects of gravity.
6. Add extra greenery and foliage wherever there are sparse area in your design. To finish the edges, secure long, flowing pieces of greenery to the wire frame behind your bunches.
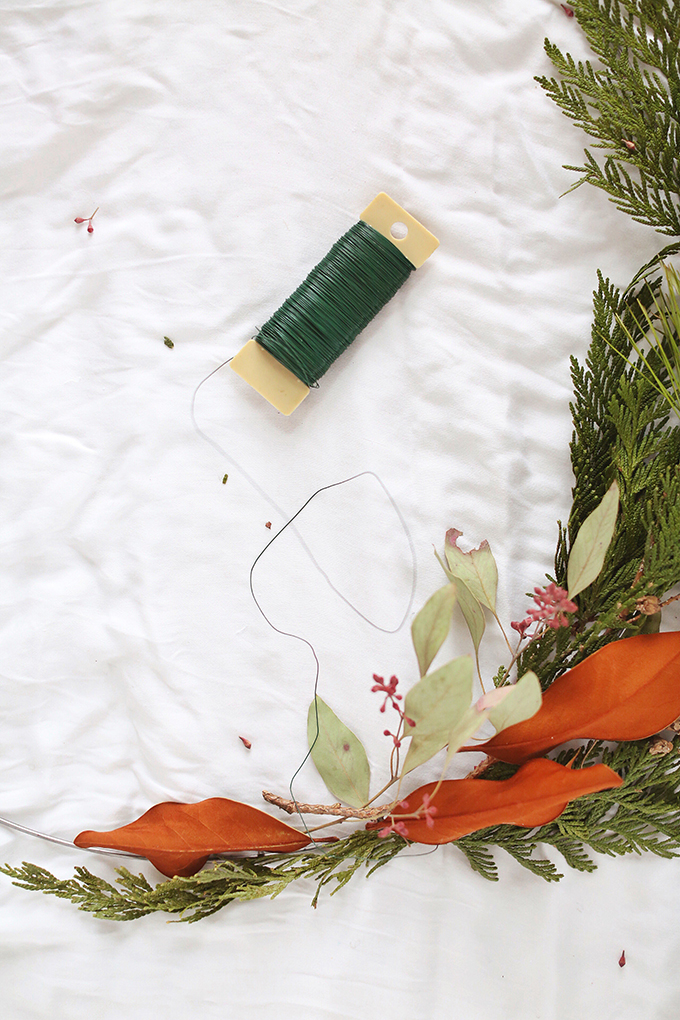
7. You may have a lot of paddle wire showing at the base of wreath where you secured your first bundle, (I did!). No worries — this is an easy fix! Since you have lots of secure wire to work with now, start sticking pieces of greenery and foliage into the wire closure counter clockwise to conceal the wire. Repeat this process until your starting point is mostly covered — and if you can sill see some paddle wire, don’t worry! At a distance, it won’t be visible.

8. Finally, hold your wreath up to do a final check for any holes in your design or pieces that need to be secured. At this point you’ll have lots of wire holding your wreath together that you can pop extra pieces of greenery and foliage into to finish things off.

9. Depending on the wire frame you chose, this may not be necessary, but I painted mine rose gold — with nail polish! To be honest, it’s all I had on hand at the time, but it worked perfectly. Of course, you can always look for a metallic hoop, but if you’re not able to find one, rose gold, gold or silver nail polish or craft paint does the trick! If you do paint your wire frame, allow it to dry fully before handling or hanging your wreath.
10. Voila — you made your very own Asymmetrical Holiday Wreath! Unless you’re using fresh flowers in your wreath, everything will dry nicely. In fact, and the time I shot this post, this wreath was 2 weeks old.
Hanging Your Asymmetrical Holiday Wreath
And now, for the final touch — hanging your wreath in your home to enjoy! If you’re planning to hang your wreath indoors, I’d suggest simply swapping your wreath for a piece of artwork. That’s what we did — and it works perfectly (told you I was keeping it simple this season!).
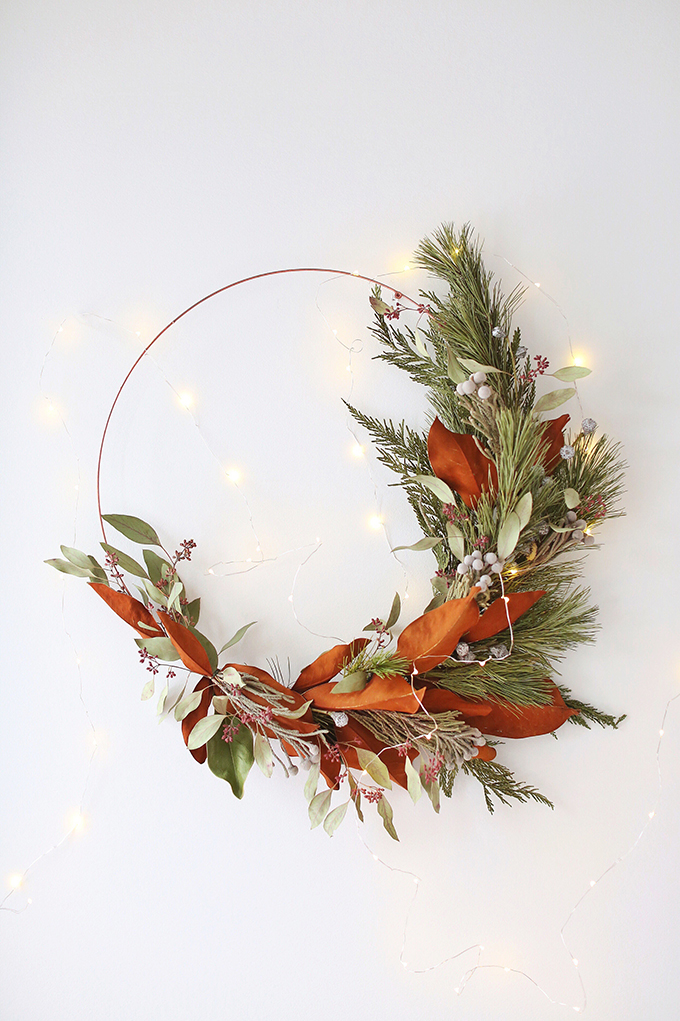
If you can work with existing screws in the wall, it will ensure that the wreath has something sturdy to hang on and you won’t have to make a new hole. I actually painted the head of the screw with my rose gold nail polish to conceal it — can you spot it in these photos? Make an extra festive feature wall by stringing some fairy lights along the wall behind the wreath (hide your nails with the greenery of the wreath)!
You can also attach a piece of velvet ribbon or twine to the top of the wreath and hang it that way. This works especially well if you’re hanging your wreath on a door or window! And if you’re gifting your wreath, you can also tie a tag onto it with another piece of whatever material you use to hang it.
If you haven’t already downloaded our FREE December tech wallpapers, what are you waiting for?! Choose from 3 extra festive floral designs inspired by the holiday season and Pantone’s Colour of the Year for 2018, Ultra Violet!

FEELING FESTIVE? MORE HOLIDAY INSPIRATION

My Secret for Holiday Ready Skin
What to Wear to | Casual Holiday Parties
Classic Winter Citrus Red Sangria
5 Red Lipsticks to Try This AW17
Vanilla Pomegranate Mulled Wine
Thanks for stopping by today for this festive DIY, friends! If you make your own Asymmetrical Holiday Wreath, please let me know how it goes (I’d love to see a photo!) and feel free to reach out with any questions you have along the way. I’m planning to make a fresh wreath every year from now on — hosting or attending a wreath making party in early December is the perfect way to kick off the holiday season. Cheers to new traditions! Wishing you all a happy, joyous and peaceful holiday season.
Thank you to Style Me Pretty Living for featuring my Asymmetrical Holiday Wreath.
Disclaimer: This post is not sponsored and contains my genuine thoughts, ideas and recommendations. JustineCelina uses affiliate and referral links, which allow me to receive a small commission when you make a purchase through one of my links. Thank you for supporting the brands and businesses that support JustineCelina.com!


24 Comments
Girrrrrl. I am head over heels for this wreath! I don’t know if I’m crafty enough to pull this off myself, but I might try next year when we’re (hopefully) in our new house. I mean, I love a big classic wreath with little lights and big red boughs, but stuff like this is so much more *me*! It’s a way I feel I can be festive all while being myself.
Thanks so much for the sweet comment, love! Honestly, it’s so easy if you follow the steps and use one of these images as reference. I promise you’ll be able to make one too! Invite your girlfriends over, whip up some sangria and have a wreath making party — it would be an amazing way to break in your new place. 🙂 If you try it, let me know how it goes!
The festive lights around it add such a lovely mood! The choice of greens is wonderful, I have the design number 1 downloaded and it looks so nice on my desktop! I especially love the magnolia leaves, my mom and dad’s apartment in Rome overlooks a huge magnolia tree just outside their kitchen window! Happy Holidays, Justine!
Thanks so much, Nicoletta and happy holidays to you and your family!
This is such a lovely wreath! I love how it strikes that perfect balance of modern and traditional.
One of the things I’m most excited about with my renovations is having a proper front door again, because it means I have somewhere to hang a wreath. Totally making one of these beauties for next year’s holidays.
Thanks Isabelle! We live in an apartment so we also don’t really have a proper front door, but I love the look of wreaths indoors as well. 🙂 If you give this DIY a try next year please let me know how it goes. Wishing you a happy holiday season!
Stunning work Justine. I love the way that the dense evergreen foliage is juxtaposed against the sparse simplicity of the bare metal. I’m a big fan of asymmetric design in general, and I think that anybody would be delighted to have this decorating their home this season. Cheers.
Thank you, Sean! I also look forward to your comments. 🙂 Happy holidays to you and your family!
[…] the same basic steps as my DIY Asymmetrical Holiday Wreath tutorial (which was recently featured on Style Me Pretty Living!), I created a smaller scale wreath that […]
[…] this Asymmetrical Holiday Wreath may look familiar, as I actually created is back in 2017. The DIY post detailing how to make it has since become one of my most popular pieces of holiday content after having been featured on […]
[…] HOW TO MAKE AN ASYMMETRICAL HOLIDAY WREATH […]
[…] tree to our Mid Century Turned Wood Leg Planter, strung fairy lights along the bar and hung a fresh DIY wreath (made with holiday greens, pampas grass, cotton buds and foraged elements — in less than an […]
maybe I missed it when I was reading… when I hang mine it keeps wanting to rotate … the heavy part to the bottom and totally ruining the asymmetrical look… how to I remedy this?
Hi Heidi! I actually made my single hoop by breaking apart the a fuller hoop with a few single hoops attached (like the one pictured in my SHOP section) — this left a few notches that ‘caught’ the nail on the wall so I could hang my wreath asymmetrically. You could try measuring the diameter of the wreath, then placing 2 nails diagonally from each other on the wall, creating a really tight area for the hoop to hang (the bottom nail helping to hold it in pace) and keep it secure to keep the design asymmetrical. Or, you could try hanging it with a ribbon and using glue (a glue gun would work best) to secure the ribbon in place to keep the hoop from sliding. I hope these suggestions are helpful — let me know if you have any additional questions!
Hi! Love these. I’m planning to make this week, but how long do these tend to last for? Do you water them at all to keep them looking fresh?
Thanks!
Hi Kelti! Thanks for the kind words. I’d say if you make one now it will still stay fresh looking into the holidays. I made this wreath at the start of December and it remained beautiful until the new year. If you choose hearty materials, it should last a couple of months — of course, it wont’ look as fresh and crisp as the day you make it, but it will still be lovely. I don’t water my fresh wreaths at all and can’t think of a way you’d be able to, as the stems of the greens are arranged all over the wreath. Best of luck with your DIY wreath!
[…] the same basic steps as my DIY Asymmetrical Holiday Wreath tutorial (which was recently featured on Style Me Pretty Living!), I created a smaller scale wreath that […]
[…] How to Make An Asymmetrical Holiday Wreath […]
[…] How to Make An Asymmetrical Holiday Wreath […]
[…] How to Make An Asymmetrical Holiday Wreath […]
[…] uses dried leaves that have a wonderful autumn feel, and keeps it simple. Asymmetrical Wreath, from justinecelina.comDried flowers are forever popular- they’re simple, timeless, and have a way of expressing the […]
[…] ASYMMETRICAL HOLIDAY WREATH […]
[…] ASYMMETRICAL HOLIDAY WREATH […]
[…] ASYMMETRICAL HOLIDAY WREATH […]